三思系列:重新认识Drawable
前言
前一段时间看到宏洋公众号推送了一篇关于splash页面动效的文章,具体为:将一个英文单词拆分为多个字母,散落在屏幕中,然后按照一定的路径回归,最终展示一段流光效果,完成splash页面。
当时文章中提到的做法是自定义View的实现。当时脑海中灵光一闪,感觉还是用Drawable来干这个事情更加合适。
记忆中,我曾经整理过一篇Drawable基础内容的文章,可惜丢失了,在开始干这件事情之前,我们把这一块内容再完整的梳理一遍。
这篇文章会比较长,先给出导图
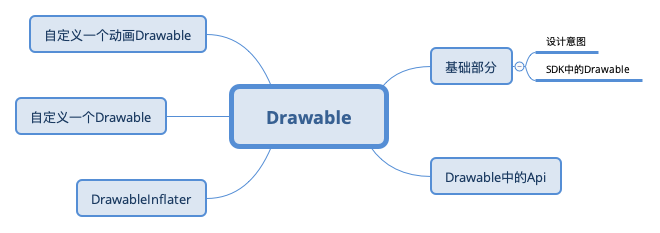
Drawable的设计意图
A Drawable is a general abstraction for "something that can be drawn." Most often you will deal with Drawable as the type of resource retrieved for drawing things to the screen; the Drawable class provides a generic API for dealing with an underlying visual resource that may take a variety of forms. Unlike a View, a Drawable does not have any facility to receive events or otherwise interact with the user.
这是SDK文档中的内容,大致含义呢:drawable是对于"可以被绘制的内容"的抽象。 多数情况下,我们将获取的资源作为Drawable绘制在屏幕上, Drawable类提供了一个通用API,用于处理可能采用多种类型的底层可视资源。 不像View,Drawable没有任何接收事件或以其他方式与用户交互的功能。
为了简化绘制,Drawable中为使用者提供了一定的机制操作绘制:
The {@link #setBounds} method must be called to tell the > Drawable where it is drawn and how large it should be. All Drawables > should respect the requested size, often simply by scaling their > imagery. A client can find the preferred size for some Drawables with > the {@link #getIntrinsicHeight} and {@link #getIntrinsicWidth} methods.
The {@link #getPadding} method can return from some Drawables > information about how to frame content that is placed inside of them. > For example, a Drawable that is intended to be the frame for a button > widget would need to return padding that correctly places the label > inside of itself.
The {@link #setState} method allows the client to tell the Drawable > in which state it is to be drawn, such as "focused", "selected", etc. > Some drawables may modify their imagery based on the selected state.
The {@link #setLevel} method allows the client to supply a single > continuous controller that can modify the Drawable is displayed, such as > a battery level or progress level. Some drawables may modify their > imagery based on the current level.
A Drawable can perform animations by calling back to its client > through the {@link Callback} interface. All clients should support this > interface (via {@link #setCallback}) so that animations will work. A > simple way to do this is through the system facilities such as > {@link android.view.View#setBackground(Drawable)} and > {@link android.widget.ImageView}.
继续简要翻译一下重要内容
- setBounds 方法必须被调用,它告知了Drawable应该被绘制的位置和大小
- getPadding 方法可以获知一些Drawable绘制时的内边距信息
- setState 方法允许使用者告知Drawable应当在哪些状态时绘制,例如获取了焦点,被选中等
- setLevel 方法允许调用者提供一个连续的控制器,可以修改显示的可绘制内容, 例如电池电量或进度。一些Drawable可能会根据当前的level改变其图像
- Drawable可以展现动画,通过设置Callback接口回调给他的使用者,所有的使用者,需要通过 setCallback方法提供回调函数支持以让动画工作。一个简便方式是通过一些系统设施例如:View#setBackground 和 ImageView
注:Drawable展现动画部分,这里翻译的比较晦涩,具体细节见:Drawable Api概览
小结:Android SDK中抽象了Drawable体系,不同于View体系,它仅负责描述可绘制的内容,不可进行用户交互,其子类将描述各类可绘制内容的特性。
SDK中的Drawable子类概览
注:经过多次思考,我最终把这一段的草稿删除了,这部分体系实在是太大,浅写无异于copy官方文档,深挖就会影响文章关注的重点。 如果对系统中提供的Drawable子类感兴趣的,建议深入源码看一下。
Drawable Api概览
在开头的设计意图探索中,我们已经阅读了几个关键API:setBound,getPadding,setState,setLevel,setCallback的信息
还有getBound,copyBound等获取边界信息的API,RippleDrawable和一些自定义的Drawable还覆写了getDirtyBounds,用以获取它可能涉及到的范围边界
横向的方向相关:setLayoutDirection,getLayoutDirection,onLayoutDirectionChanged
透明度相关:setAlpha,getAlpha
着色和颜色filter相关:setColorFilter,getColorFilter,clearColorFilter,
setTint,setTintList,setTintMode,setTintBlendMode
尺寸测量:getIntrinsicWidth,getIntrinsicHeight,getMinimumWidth,getMinimumHeight
当作为背景使用时,getMinimumXXX用于告知View建议使用的最小宽高。getIntrinsicXXX是获取一个Drawable的内在的、固有的宽高,这个值和设备屏幕密度是有关系的。
自我独立:mutate,和缓存机制有关,调用得到一个新的Drawable,这样自己的状态就不会影响到其他使用处。
重绘相关:setCallback(@Nullable Callback cb),getCallback(),invalidateSelf(),
scheduleSelf(@NonNull Runnable what, long when),unscheduleSelf(@NonNull Runnable what)
上面我们提到这一组API会详细说一下。以AnimationDrawable为例,这是一个动画Drawable,
class AnimationDrawable {
    private void setFrame(int frame, boolean unschedule, boolean animate) {
        if (frame >= mAnimationState.getChildCount()) {
            return;
        }
        mAnimating = animate;
        mCurFrame = frame;
        selectDrawable(frame);
        if (unschedule || animate) {
            unscheduleSelf(this);
        }
        if (animate) {
            // Unscheduling may have clobbered these values; restore them
            mCurFrame = frame;
            mRunning = true;
            scheduleSelf(this, SystemClock.uptimeMillis() + mAnimationState.mDurations[frame]);
        }
    }
}
设置某一帧之后,如果是使用动画,则会调用scheduleSelf,时间戳是下一帧应该出现的时间戳。
class Drawable {
    public void scheduleSelf(@NonNull Runnable what, long when) {
        final Callback callback = getCallback();
        if (callback != null) {
            callback.scheduleDrawable(this, what, when);
        }
    }
}
如果存在Callback,则调用Callback#scheduleDrawable。
以View的代码为例
class View {
    public void scheduleDrawable(@NonNull Drawable who, @NonNull Runnable what, long when) {
        if (verifyDrawable(who) && what != null) {
            final long delay = when - SystemClock.uptimeMillis();
            if (mAttachInfo != null) {
                mAttachInfo.mViewRootImpl.mChoreographer.postCallbackDelayed(
                        Choreographer.CALLBACK_ANIMATION, what, who,
                        Choreographer.subtractFrameDelay(delay));
            } else {
                // Postpone the runnable until we know
                // on which thread it needs to run.
                getRunQueue().postDelayed(what, delay);
            }
        }
    }
}
很简单,验证合法性之后定时执行Runnable,Runnable的内容:
class AnimationDrawable {
    public void run() {
        nextFrame(false);
    }

    private void nextFrame(boolean unschedule) {
        int nextFrame = mCurFrame + 1;
        final int numFrames = mAnimationState.getChildCount();
        final boolean isLastFrame = mAnimationState.mOneShot && nextFrame >= (numFrames - 1);

        // Loop if necessary. One-shot animations should never hit this case.
        if (!mAnimationState.mOneShot && nextFrame >= numFrames) {
            nextFrame = 0;
        }

        setFrame(nextFrame, unschedule, !isLastFrame);
    }
}
显示下一帧,逻辑非常清晰,不再进行解析。
小结: 这一段我们对Drawable的API进行了简单的梳理,略去了大量关于创建的API以及和开发不太紧密的API,完成了一次概览。 更完善的认知需要再仔细研读源码内容,限于篇幅不再展开。
DrawableInflater
顾名思义,这是一个Drawable加载器,和LayoutInflater类似,从一种满足特定语法的语法式中解析出实例对象,显然,在Android中它用来处理xml语法的drawable资源文件。
看一下文档:
/**
 * Instantiates a drawable XML file into its corresponding
 * {@link android.graphics.drawable.Drawable} objects.
 * <p>
 * For performance reasons, inflation relies heavily on pre-processing of
 * XML files that is done at build time. Therefore, it is not currently possible
 * to use this inflater with an XmlPullParser over a plain XML file at runtime;
 * it only works with an XmlPullParser returned from a compiled resource (R.
 * <em>something</em> file.)
 *
 * @hide Pending API finalization.
 */
需要注意,从性能角度上,这种创建严重依赖于构建时的预处理,因此,目前不可能利用它和 XmlPullParser 一起 在运行时解析一个xml文件 并创建对象实例 只适用于那些已经在资源编译阶段返回的XmlPullParser
我们知道,一个受检的xml document,会被解析为语法树,得到树中的标签节点和属性信息。
我们阅读DrawableInflater的代码,有两段关于创建Drawable具体实例的内容,这是根据tag创建实例的代码
class DrawableInflater {
    private Drawable inflateFromTag(@NonNull String name) {
        switch (name) {
            case "selector":
                return new StateListDrawable();
            case "animated-selector":
                return new AnimatedStateListDrawable();
            case "level-list":
                return new LevelListDrawable();
            case "layer-list":
                return new LayerDrawable();
            case "transition":
                return new TransitionDrawable();
            case "ripple":
                return new RippleDrawable();
            case "adaptive-icon":
                return new AdaptiveIconDrawable();
            case "color":
                return new ColorDrawable();
            case "shape":
                return new GradientDrawable();
            case "vector":
                return new VectorDrawable();
            case "animated-vector":
                return new AnimatedVectorDrawable();
            case "scale":
                return new ScaleDrawable();
            case "clip":
                return new ClipDrawable();
            case "rotate":
                return new RotateDrawable();
            case "animated-rotate":
                return new AnimatedRotateDrawable();
            case "animation-list":
                return new AnimationDrawable();
            case "inset":
                return new InsetDrawable();
            case "bitmap":
                return new BitmapDrawable();
            case "nine-patch":
                return new NinePatchDrawable();
            case "animated-image":
                return new AnimatedImageDrawable();
            default:
                return null;
        }
    }
}
如果您已经在第二小节自行对Drawable的子类进行了概览,应该对这些内容不陌生了。
以Android项目模板为例,工程会创建一个启动图标:
<vector xmlns:android="http://schemas.android.com/apk/res/android"
        xmlns:aapt="http://schemas.android.com/aapt"
        android:width="108dp"
        android:height="108dp"
        android:viewportWidth="108"
        android:viewportHeight="108">
    <path
        android:pathData="M31,63.928c0,0 6.4,-11 12.1,-13.1c7.2,-2.6 26,-1.4 26,-1.4l38.1,38.1L107,108.928l-32,-1L31,63.928z">
        <aapt:attr name="android:fillColor">
            <gradient
                android:endX="85.84757"
                android:endY="92.4963"
                android:startX="42.9492"
                android:startY="49.59793"
                android:type="linear">
                <item
                    android:color="#44000000"
                    android:offset="0.0"/>
                <item
                    android:color="#00000000"
                    android:offset="1.0"/>
            </gradient>
        </aapt:attr>
    </path>
    <path
        android:fillColor="#FFFFFF"
        android:fillType="nonZero"
        android:pathData="M65.3,45.828l3.8,-6.6c0.2,-0.4 0.1,-0.9 -0.3,-1.1c-0.4,-0.2 -0.9,-0.1 -1.1,0.3l-3.9,6.7c-6.3,-2.8 -13.4,-2.8 -19.7,0l-3.9,-6.7c-0.2,-0.4 -0.7,-0.5 -1.1,-0.3C38.8,38.328 38.7,38.828 38.9,39.228l3.8,6.6C36.2,49.428 31.7,56.028 31,63.928h46C76.3,56.028 71.8,49.428 65.3,45.828zM43.4,57.328c-0.8,0 -1.5,-0.5 -1.8,-1.2c-0.3,-0.7 -0.1,-1.5 0.4,-2.1c0.5,-0.5 1.4,-0.7 2.1,-0.4c0.7,0.3 1.2,1 1.2,1.8C45.3,56.528 44.5,57.328 43.4,57.328L43.4,57.328zM64.6,57.328c-0.8,0 -1.5,-0.5 -1.8,-1.2s-0.1,-1.5 0.4,-2.1c0.5,-0.5 1.4,-0.7 2.1,-0.4c0.7,0.3 1.2,1 1.2,1.8C66.5,56.528 65.6,57.328 64.6,57.328L64.6,57.328z"
        android:strokeWidth="1"
        android:strokeColor="#00000000"/>
</vector>
其实就是机器人头的图标,它会被加载为VectorDrawable
我们反推一下,调用者为:
class DrawableInflater {
    @NonNull
    public Drawable inflateFromXml(@NonNull String name, @NonNull XmlPullParser parser,
                                   @NonNull AttributeSet attrs, @Nullable Theme theme)
            throws XmlPullParserException, IOException {
        return inflateFromXmlForDensity(name, parser, attrs, 0, theme);
    }


    @NonNull
    Drawable inflateFromXmlForDensity(@NonNull String name, @NonNull XmlPullParser parser,
                                      @NonNull AttributeSet attrs, int density, @Nullable Theme theme)
            throws XmlPullParserException, IOException {
        // Inner classes must be referenced as Outer$Inner, but XML tag names
        // can't contain $, so the <drawable> tag allows developers to specify
        // the class in an attribute. We'll still run it through inflateFromTag
        // to stay consistent with how LayoutInflater works.
        if (name.equals("drawable")) {
            name = attrs.getAttributeValue(null, "class");
            if (name == null) {
                throw new InflateException("<drawable> tag must specify class attribute");
            }
        }

        //注意这里 --1
        Drawable drawable = inflateFromTag(name);
        if (drawable == null) {
            //注意这里 --2
            drawable = inflateFromClass(name);
        }
        drawable.setSrcDensityOverride(density);
        //注意这里 --3
        drawable.inflate(mRes, parser, attrs, theme);
        return drawable;
    }
}
上面标记了3处注意点, 第一处即为内置的顶层drawable创建
第二处我们稍后再看
第三处将parser,属性和主题交给生成的Drawable继续解析。不同的Drawable子类按照自身特性实现自己的解析需求。
以LevelListDrawable为例,我们知道它内部还可以添加Drawable作为不同的level,这是通过递归调用解析创建实现的, 最终追溯源码至Drawable
public class LevelListDrawable {
    private void inflateChildElements(Resources r, XmlPullParser parser, AttributeSet attrs,
                                      Theme theme) throws XmlPullParserException, IOException {
        //略
        while ((type = parser.next()) != XmlPullParser.END_DOCUMENT
                && ((depth = parser.getDepth()) >= innerDepth
                || type != XmlPullParser.END_TAG)) {
            //略

            Drawable dr;
            if (drawableRes != 0) {
                dr = r.getDrawable(drawableRes, theme);
            } else {
                //略
                //注意此处
                dr = Drawable.createFromXmlInner(r, parser, attrs, theme);
            }
            mLevelListState.addLevel(low, high, dr);
        }
        onLevelChange(getLevel());
    }
}


public class Drawable {

    public static Drawable createFromXmlInner(@NonNull Resources r, @NonNull XmlPullParser parser,
                                              @NonNull AttributeSet attrs, @Nullable Theme theme)
            throws XmlPullParserException, IOException {
        return createFromXmlInnerForDensity(r, parser, attrs, 0, theme);
    }

    @NonNull
    static Drawable createFromXmlInnerForDensity(@NonNull Resources r,
                                                 @NonNull XmlPullParser parser, @NonNull AttributeSet attrs, int density,
                                                 @Nullable Theme theme) throws XmlPullParserException, IOException {
        return r.getDrawableInflater().inflateFromXmlForDensity(parser.getName(), parser, attrs,
                density, theme);
    }
}
我们再看第二处,当特定的tag未被匹配时,会使用反射方式尝试创建Drawable:
class DrawableInflater {
    @NonNull
    private Drawable inflateFromClass(@NonNull String className) {
        try {
            Constructor<? extends Drawable> constructor;
            synchronized (CONSTRUCTOR_MAP) {
                constructor = CONSTRUCTOR_MAP.get(className);
                if (constructor == null) {
                    final Class<? extends Drawable> clazz =
                            mClassLoader.loadClass(className).asSubclass(Drawable.class);
                    constructor = clazz.getConstructor();
                    CONSTRUCTOR_MAP.put(className, constructor);
                }
            }
            return constructor.newInstance();
        }
        //略
        catch (XXX e) {
        }
    }
}
Custom drawables
All versions of Android allow the Drawable class to be extended and used at run time in place of framework-provided drawable classes. Starting in API 24, custom drawables classes may also be used in XML. Note: Custom drawable classes are only accessible from within your application package. Other applications will not be able to load them.
文档中有这样一段话,自定义的Drawable一直是可行的,但仅Api>=24时才能够用XML定义这样的资源。虽然没有仔细追溯版本源码,但应该和此处有关。
小结:我们简单阅读了DrawableInflater的源码,了解了Android如何从xml资源得到Drawable对象。需要注意的是,我们没有阅读Resource#getDrawable 的相关源码,这一块内容也很有意思,建议读者有时间自行阅读下。
自定义一个Drawable
终于来到这个环节了,为了更好的进行这个环节,我们新建一个WorkShop项目,我会按照文章中每一个小目标提出的一个小目标建立提交。 DrawableWorkShop
version 1 一个能绘制的自定义Drawable
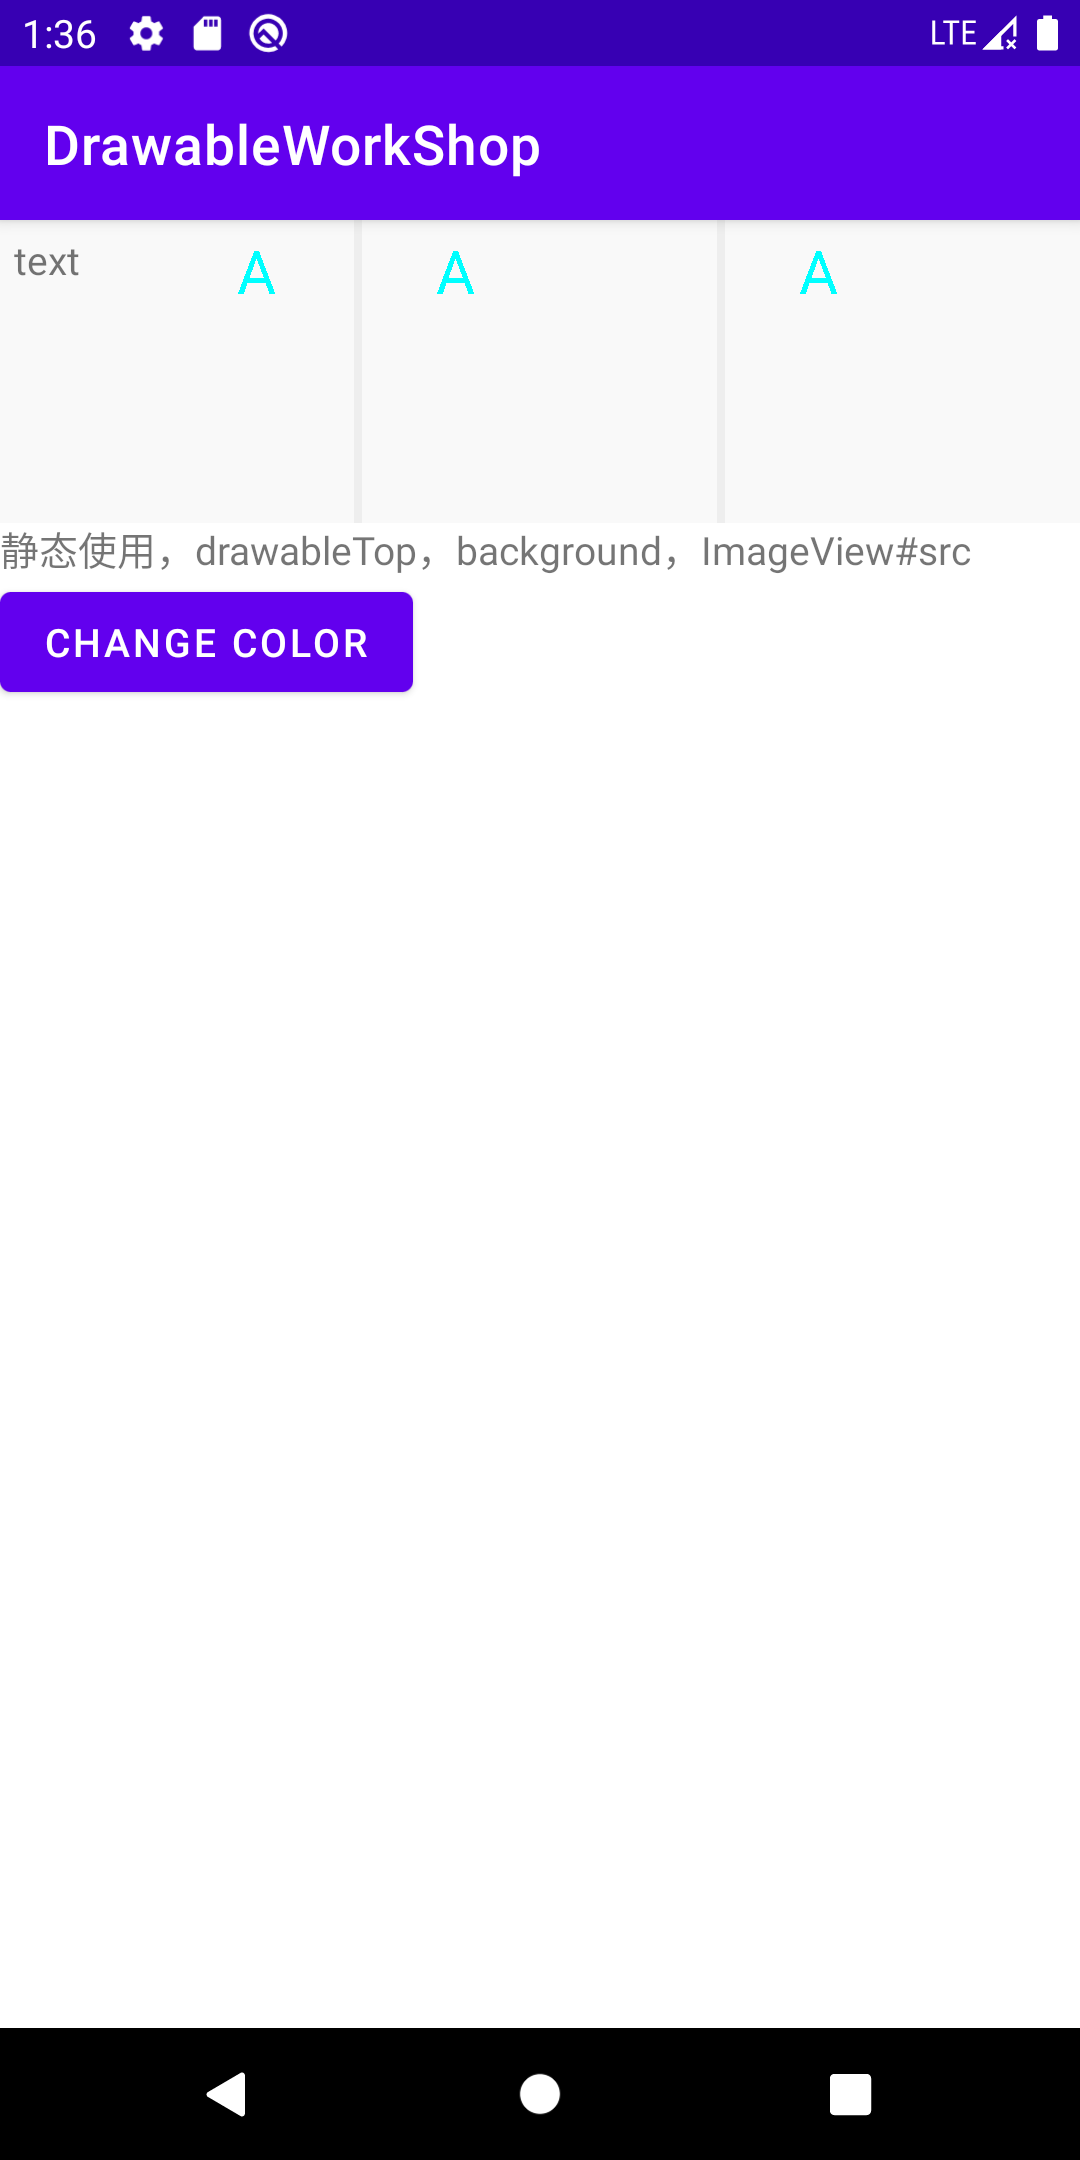
这里我们尽可能的简单,目标就是绘制一个字母,先定义类:
class LetterDrawable : Drawable() {
    val tag = "LetterDrawable"

    var letter: Char = 'A'

    val paint = Paint().apply {
        textSize = 60f
        color = Color.CYAN
    }

    override fun draw(canvas: Canvas) {
        Log.d(tag, "on draw")
        canvas.drawText(letter.toString(), 60f, 60f, paint)
    }

    override fun setAlpha(alpha: Int) {
        //ignore
    }

    override fun setColorFilter(colorFilter: ColorFilter?) {
        //ignore
    }

    override fun getOpacity(): Int {
        return PixelFormat.TRANSLUCENT
    }
}
字号字色,绘制字母的位置和内容都直接写死,
定义资源:
<?xml version="1.0" encoding="utf-8"?>
<osp.leobert.android.drawableworkshop.drawable.LetterDrawable
    xmlns:android="http://schemas.android.com/apk/res/android"
>

</osp.leobert.android.drawableworkshop.drawable.LetterDrawable>
直接使用:得到结果:
version 2 支持颜色和字号等可配
我们将单个字符改为String,添加color和textSize成员变量,并将改动设置到paint
添加属性定义:
<resources xmlns:tools="http://schemas.android.com/tools">

    <declare-styleable name="letter_drawable">
        <attr name="android:text" format="string|reference"/>
        <attr name="color" format="color|reference"/>
        <attr name="android:textSize" format="dimension|reference"/>

    </declare-styleable>

</resources>
这样我们就可以进行资源配置和解析
按照我们之前阅读的代码,我们需要覆写inflate以实现属性解析
class LetterDrawable {
    override fun inflate(
        r: Resources,
        parser: XmlPullParser,
        attrs: AttributeSet,
        theme: Resources.Theme?
    ) {
        super.inflate(r, parser, attrs, theme)
        val a: TypedArray = obtainAttributes(r, theme, attrs, R.styleable.letter_drawable)
        letter = a.getString(R.styleable.letter_drawable_android_text) ?: "A"

        textSize = a.getDimension(R.styleable.letter_drawable_android_textSize, 60f)
        color = a.getColor(R.styleable.letter_drawable_color, Color.CYAN)

        a.recycle()

        paint.color = color
        paint.textSize = textSize
    }

    private class Size(val type: Int) : ReadWriteProperty<LetterDrawable, Float?> {
        private var prop: Float? = null
        override fun getValue(thisRef: LetterDrawable, property: KProperty<*>): Float? {
            return prop ?: thisRef.run {
                val rect = Rect()
                this.paint.getTextBounds(this.letter, 0, this.letter.length, rect)
                val s = when (type) {
                    0 -> rect.width()
                    else -> rect.height()
                }.toFloat()
                prop = s
                prop
            }
        }

        override fun setValue(thisRef: LetterDrawable, property: KProperty<*>, value: Float?) {
            prop = value
        }

    }

    private var width by Size(0)
    private var height by Size(1)

    override fun draw(canvas: Canvas) {
        Log.d(tag, "on draw,$letter , $height")
        canvas.drawText(letter, 0f, height ?: 60f, paint)
    }
}
并且我们利用属性代理来封装计算宽高的细节(只是利用了小技巧,可以减少不必要的重复测量)
修改我们资源:
<?xml version="1.0" encoding="utf-8"?>
<osp.leobert.android.drawableworkshop.drawable.LetterDrawable
    xmlns:android="http://schemas.android.com/apk/res/android"
    xmlns:app="http://schemas.android.com/apk/res-auto"
    android:textSize="40sp"
    app:color="#ff3c06"
    android:text="@string/letters">


</osp.leobert.android.drawableworkshop.drawable.LetterDrawable>
运行后我们得到这样的结果:
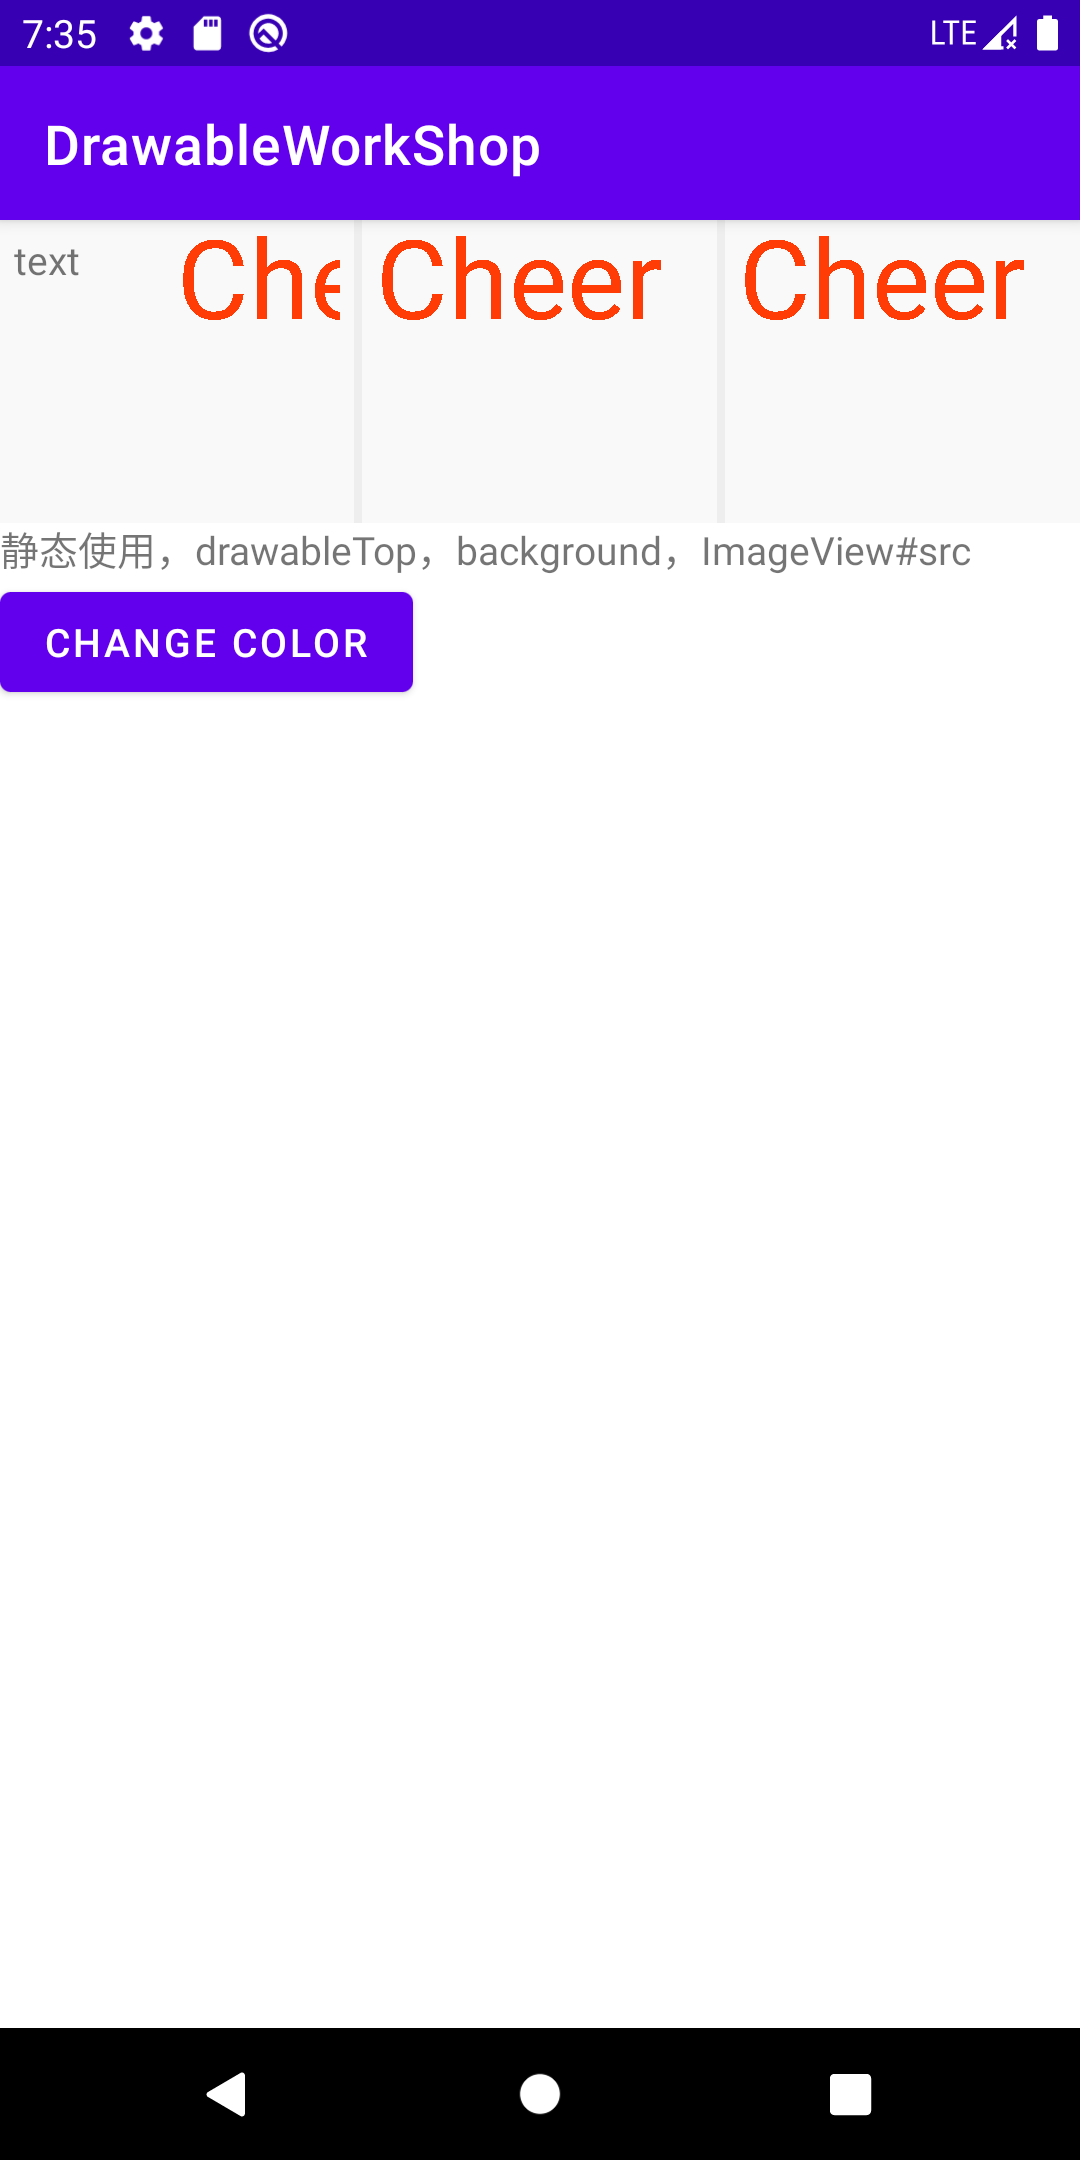
version 3: 正确处理宽高
我们发现Drawable的位置是有问题的,对于TextView,并没有在文字之上(drawableTop), 对于ImageView,并没有居中(默认 ScaleType.FIT_CENTER)。
class LetterDrawable {
    var letter: String = "A"
        set(value) {
            field = value
            width = null
            height = null
            invalidateSelf()
        }

    var color: Int = Color.CYAN
        set(value) {
            field = value
            paint.color = value
            invalidateSelf()
        }

    var textSize: Float = 60f
        set(value) {
            field = value
            width = null
            height = null
            paint.textSize = value
            invalidateSelf()
        }

    override fun getIntrinsicHeight(): Int {
        return height?.toInt() ?: -1
    }

    override fun getIntrinsicWidth(): Int {
        return width?.toInt() ?: -1
    }
}
并且当颜色、文字、字号变更时触发重新计算和重绘
看一下结果:
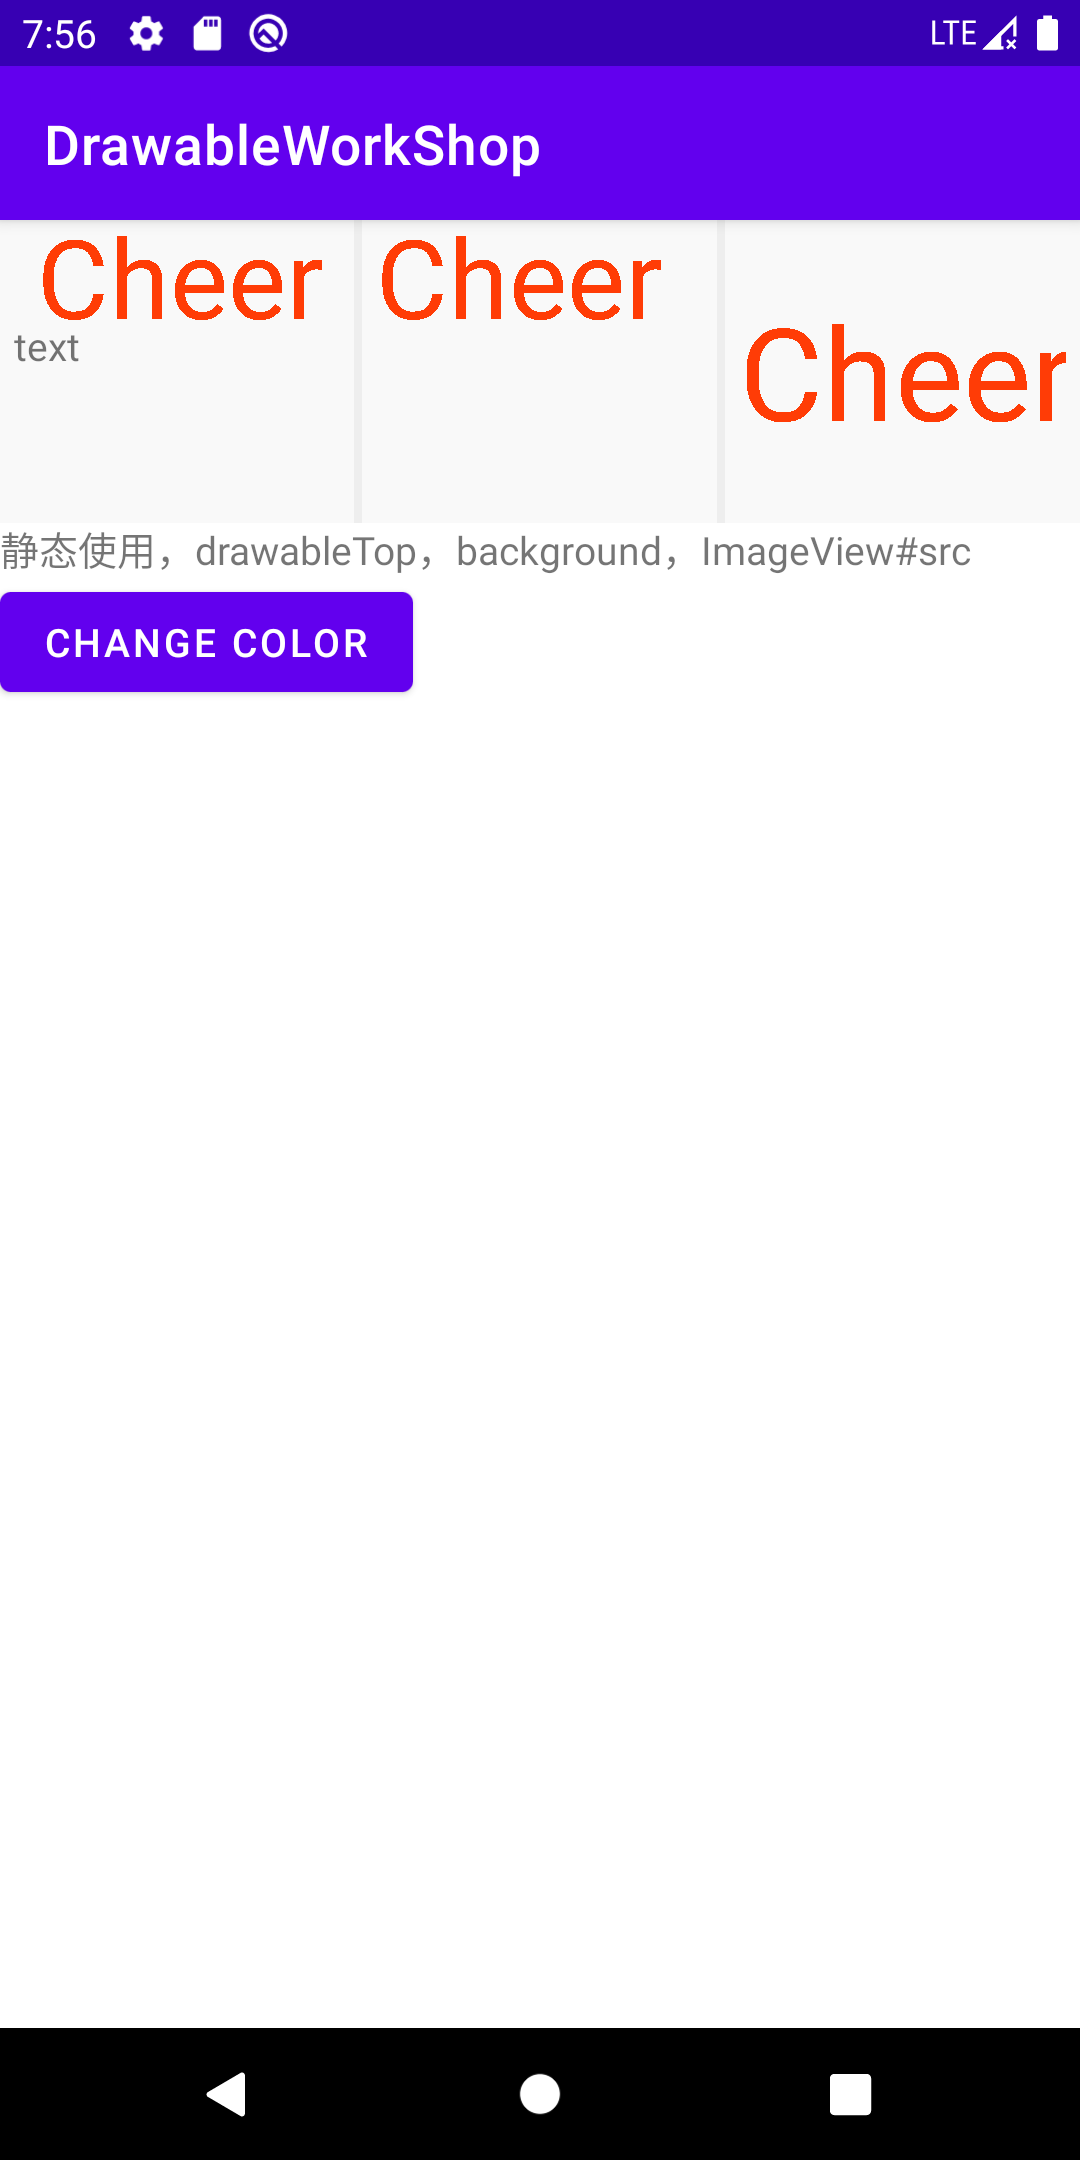
注:更多和Canvas和Paint的内容忽略,Padding和文字边距等细节忽略
小结:这一小节到此基本可以结束了,我们用了三步实现了一个简单自定义Drawable, 并且在比较常见的场景下进行了效果演示。读者可以在此基础上在对于padding等属性进行尝试, 以及尝试绘制自己感兴趣的内容。
自定义一个动画Drawable
这一次,我们尝试让字从分散,开始聚拢,最终排列成一行。因为它的draw规则更加特殊,我们新建一个Drawable进行演示。
还是在原来的项目上,version 直接递增
version 4: 先让一个字母动起来
目标:让字母从一个随机的初始位置,匀速运动到终点位置。约定最终将文字绘制在中心
我们建立一个新的类AnimLetterDrawable,迁移LetterDrawable中的主要逻辑,并实现Runnable接口,以实现schedule 时的主要逻辑; 实现Animatable2接口并完成动画相关逻辑
class AnimLetterDrawable : Drawable(), Animatable2, Runnable {
    private var frameIndex = 0

    private val totalFrames = 30 * 3 //3 second, 30frames per second

    private val animationCallbacks: MutableSet<Animatable2.AnimationCallback> = linkedSetOf()

    private var mAnimating: Boolean = false

    private fun setFrame(frame: Int, unschedule: Boolean, animate: Boolean) {
        if (frame >= totalFrames) {
            return
        }
        mAnimating = animate
        frameIndex = frame

        if (unschedule || animate) {
            unscheduleSelf(this)
        }
        if (animate) {
            // Unscheduling may have clobbered these values; restore them
            frameIndex = frame

            scheduleSelf(this, SystemClock.uptimeMillis() + durationPerFrame)
        }
        invalidateSelf()
    }

    private fun nextFrame(unschedule: Boolean) {
        var nextFrame: Int = frameIndex + 1
        val isLastFrame = nextFrame + 1 == totalFrames
        if (nextFrame + 1 > totalFrames) {
            nextFrame = totalFrames - 1
        }

        setFrame(nextFrame, unschedule, !isLastFrame)
    }

    private val durationPerFrame = 3000 / totalFrames

    override fun start() {
        Log.d(tag, "start called")
        mAnimating = true

        if (!isRunning) {
            // Start from 0th frame.
            setFrame(
                frame = 0, unschedule = false, animate = false
            )
        } else {
            setFrame(
                frame = 0, unschedule = false, animate = true
            )
        }
    }

    override fun stop() {
        mAnimating = false

        if (isRunning) {
            frameIndex = 0
            //un-schedule it at first
            unscheduleSelf(this)

            setFrame(0, unschedule = true, animate = false)
        }
    }

    override fun isRunning(): Boolean {
        return mAnimating
    }

    override fun registerAnimationCallback(callback: Animatable2.AnimationCallback) {
        animationCallbacks.add(callback)
    }

    override fun unregisterAnimationCallback(callback: Animatable2.AnimationCallback): Boolean {
        return animationCallbacks.remove(callback)
    }

    override fun clearAnimationCallbacks() {
        animationCallbacks.clear()
    }

    override fun run() {
        Log.d(tag, "callback by schedule")
        if (isRunning) {
            nextFrame(false)
        } else {
            //safe call
            setFrame(0, unschedule = true, animate = false)
        }
    }
}
这一段代码虽然有点长,但是逻辑很简单,阅读文章过程中,可以忽略这部分代码的细节。
显然,我们还需要实现:正确绘制每一帧
在约定的目标中,每个字母从一个 随机的初始位置,匀速运动 到 终点位置。那么,对于任意一个字母,只需要确定 四个参数,即可确定其 位置
- 总帧数
- 当前帧数
- 字母起始位置
- 字母结束位置
延伸:上面的例子中,我们约定了轨迹是直线,延伸开来,其实我们只需要一个
location = f(time)的函数和time值即可确定其位置。一般情况下,我们需要关心轨迹方程,和加速度公式。有加速度公式,我们按照时间积分得到
速度-时间函数,再按照时间积分,得到移动距离-时间函数, 在有轨迹方程和起始点的情况下,就可以找到任意时间的位置,得到location = f(time)函数
当然,因为我们的场景足够简单,起始点和终点确定的线段即为路径,运动为匀速,当前时间 通过 当前帧,每帧时间确定,达到总动画时长(最后一帧)时
达到终点
x = startX + (endX - startX) * time / totalTimey = startY + (endY - startY) * time / totalTime
附上计算相关的源码: 运动过程中我是适当处理了文字的透明度
class AnimLetterDrawable : Drawable(), Animatable2, Runnable {
    private val originalLetterLocations = SparseArray<PointF>()

    private val finalLetterLocations = SparseArray<PointF>()

    override fun draw(canvas: Canvas) {
        Log.d(tag, "on draw,$letters , $height,$frameIndex")

        val progress = if (totalFrames > 1) {
            frameIndex.toFloat() / (totalFrames - 1).toFloat()
        } else {
            1f
        }

        paint.alpha = min(255, (255 * progress).toInt() + 100)

        for (i in letters.indices) {
            val endPoint: PointF = finalLetterLocations.get(i)
            val startPoint: PointF = originalLetterLocations.get(i)
            val x: Float = startPoint.x + (endPoint.x - startPoint.x) * progress
            val y: Float = startPoint.y + (endPoint.y - startPoint.y) * progress
            canvas.drawText(letters[i].toString(), x, y, paint)
        }

    }

    override fun onBoundsChange(bounds: Rect) {
        super.onBoundsChange(bounds)
        Log.d(tag, "onBoundsChange, $bounds")

        height = bounds.height().toFloat()
        width = bounds.width().toFloat()

        calcLetterStartEndLocations()

        invalidateSelf()
    }

    private fun calcLetterStartEndLocations() {
        originalLetterLocations.clear()
        finalLetterLocations.clear()

        val height = this.height ?: throw IllegalStateException("height cannot be null")
        val width = this.width ?: throw IllegalStateException("width cannot be null")

        val centerY: Float = height / 2f + paint.textSize / 2

        val totalLength = paint.measureText(letters)
        val startX = (width - totalLength) / 2

        var currentStartX = startX

        for (i in letters.indices) {
            val str: String = letters[i].toString()
            val currentLength: Float = paint.measureText(str)


            originalLetterLocations.put(
                i, PointF(
                    Math.random().toFloat() * width, Math.random()
                        .toFloat() * height
                )
            )

            finalLetterLocations.put(i, PointF(currentStartX, centerY))
            // TODO: 2021/2/1 consider padding for letters inner
            currentStartX += currentLength

        }
    }
}
最终我们看一下效果: 大约从第四秒开始点击了start,中间点击了stop,随后又点击了start
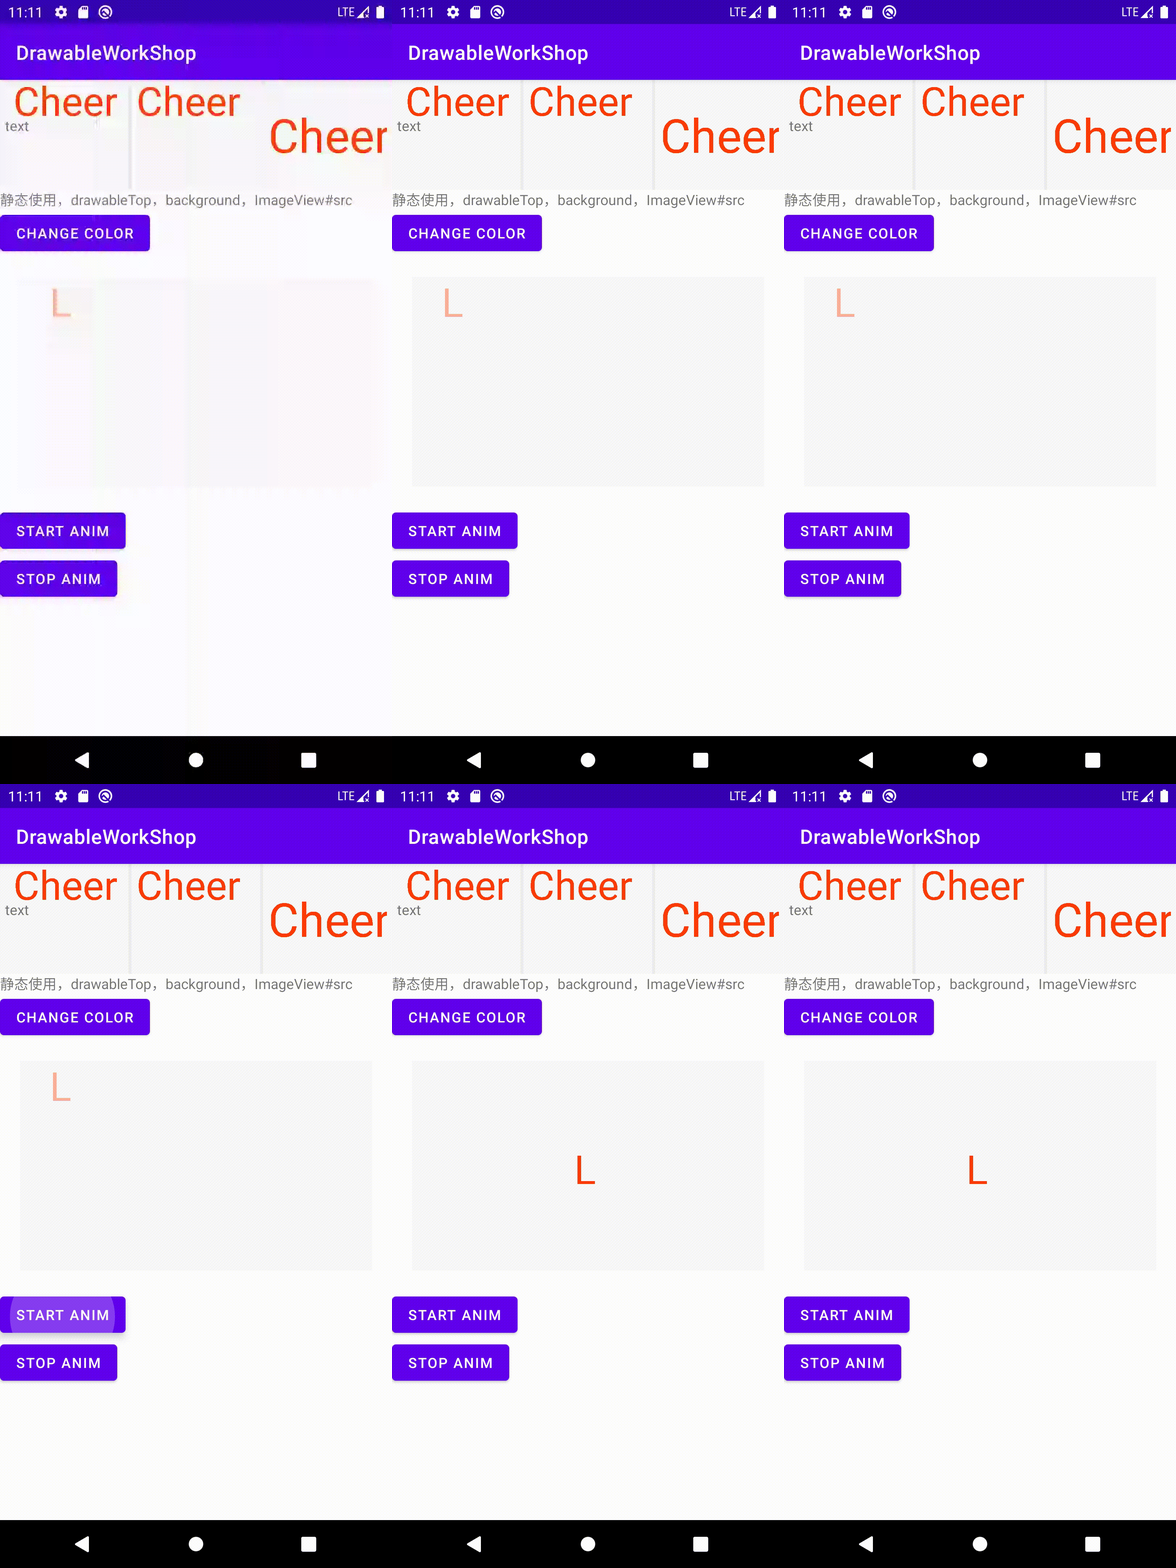
注:gif丢失了一定的连贯性,可以看一下录制的视频 链接 因为起始位置是随机的,所以每次的效果都会有差别
version 5 让所有的字母都动起来
其实细心的读者应该发现了,上面Version 4的代码已经可以让每个字母都动起来了。
先来试一下效果,把Drawable资源的text改成Leobert,看一下效果:
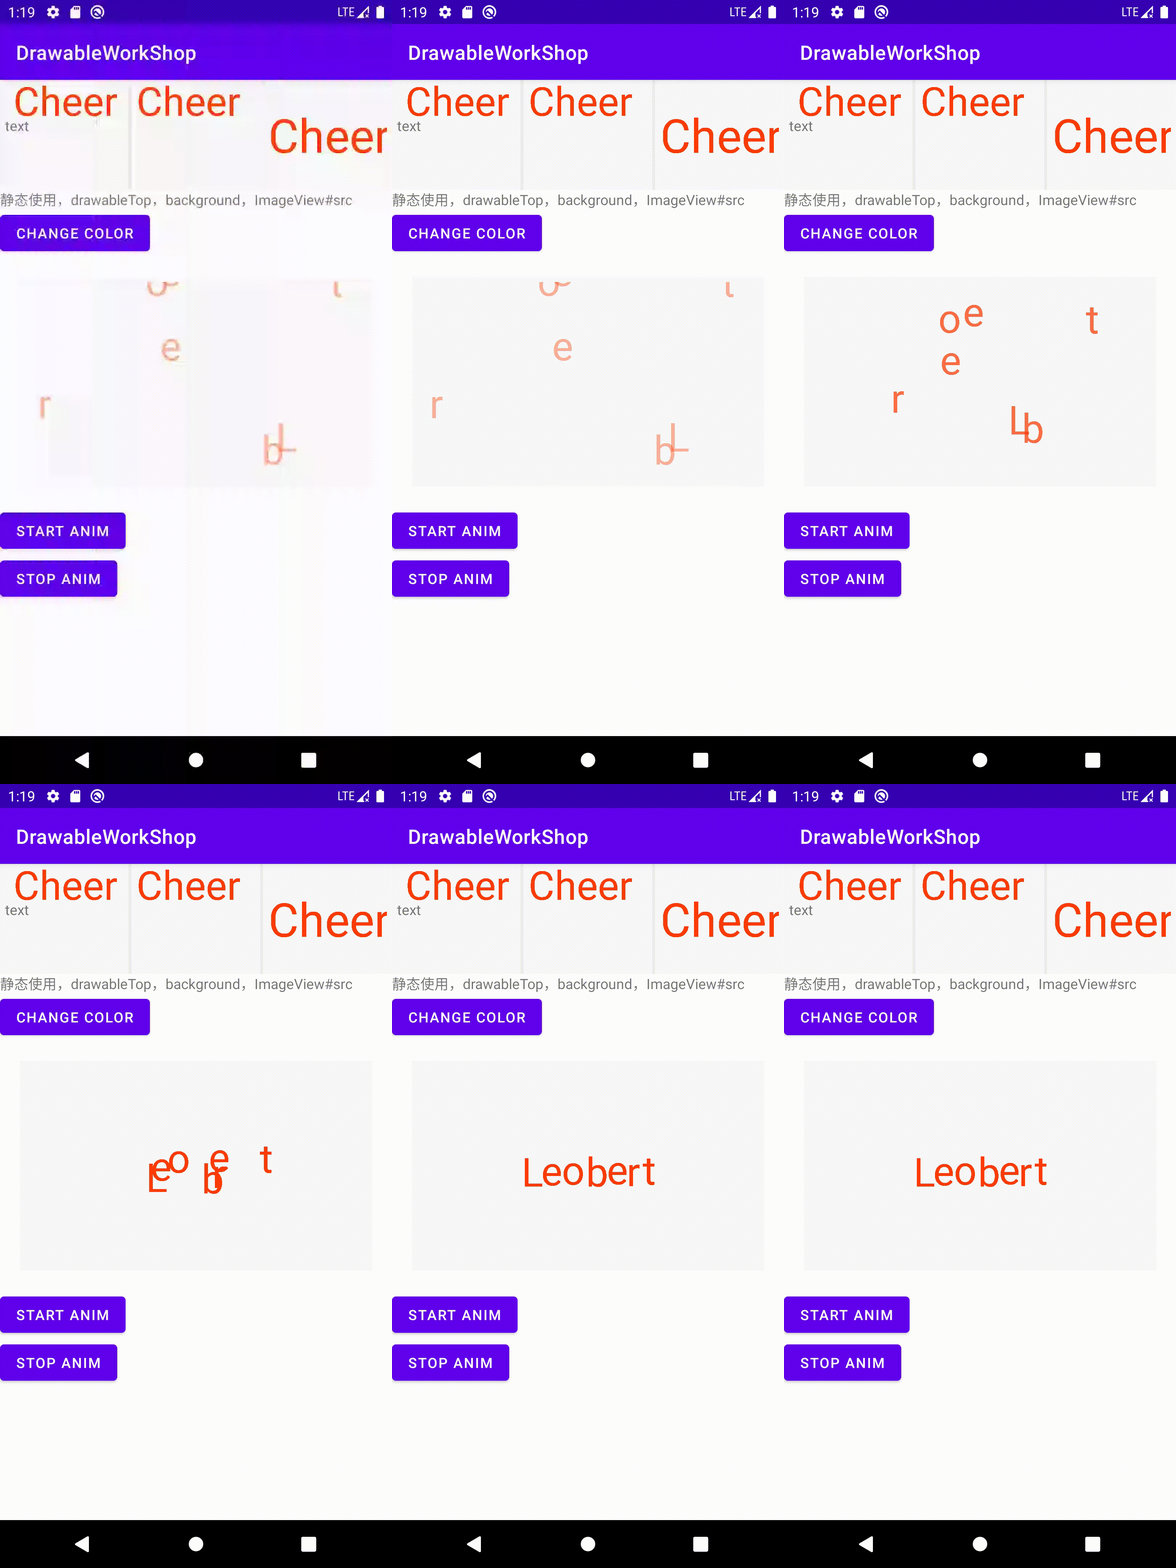
录制视频:链接
可能有些读者这时候已经在思考,继续添加各种配置支持项,改变初始点的随机位置算法,计算过程中更加细致的考虑字号、文字留白等等等等细节了。
打住,我们的目标是重新梳理Drawable中的知识,而不是实现一个特定的Drawable。到这里,我们已经实现了一个自定义的动画Drawable。
最终总结和反思
这篇文章中,我们梳理了Drawable的设计意图,自行梳理了Drawable子类概览,梳理了Drawable的API概览,练习了自定义Drawable。
我们再思考几个问题:
自定义View和自定义Drawable的区别是什么
前者是对于视图的自定义,后者是对于绘制的自定义。两者有一定的关联性,因为视图也是需要通过视觉呈现给用户的,有很大一部和绘制相关;
但自定义View不仅仅可以自定义绘制,还可以自定义交互,这一点是自定义Drawable不具备的。如果我们仅仅是期望对绘制进行自定义,选择自定义Drawable即可;
相比于自定义View,自定义Drawable在应用内的适用性更广,它具体描述了一种绘制,所以,只要存在绘制机制的地方,理论上就可以使用它。
各种"花里胡哨"的效果都可以这样干吗
可以但不是所有的都建议。一些简单的场景,例如一种点击特效、一种Progress效果 是建议这样处理的。
一些复杂的场景,例如启动图、固定的酷炫的转场等,是不建议这样处理的。不是说不建议用自定义Drawable处理,而是不建议
再用代码去直接描述Draw的内容。
对于复杂内容,可以对其内容进行抽象和分类,一般来说,我们可以从:
- 静态、动态
- 矢量描述、非矢量描述
两个维度区分一个要绘制的内容;
对于静态的,或者矢量描述的内容,已经有相关的类进行抽象描述。而对于动态的非矢量描述的绘制内容,
它们往往复杂,而且很具体,用纯代码进行描述太糟糕了。应当建立抽象体系并结合中间物来描述它们。
以大名鼎鼎的Lottie为例,设计使用AE创作动画文件,并导出成lottie的动画文件:
- 不可矢量描述的、唯一命名的图
- json格式封装的所有帧信息
那么只需要描述:
- 解析文件
- 加载帧信息
- 展示帧,即绘制帧
- 按照动画时间和帧信息schedule
即可。内容设计这种事情,就交给UI和UX了
从技术梳理和博客的角度看,这篇文章的内容已经结束了,从商业投产的角度看,这篇文章的内容远没有结束